
Your agent needs an AI model before it can reply. The quickest way is the ChatGPT account you already have: you pair it with a one-time code, and it takes about a minute. The pictures below come from a real OneClickClaw server running OpenClaw 2026.9.5, taken on 23 September 2026.
Step 1: Open your agent
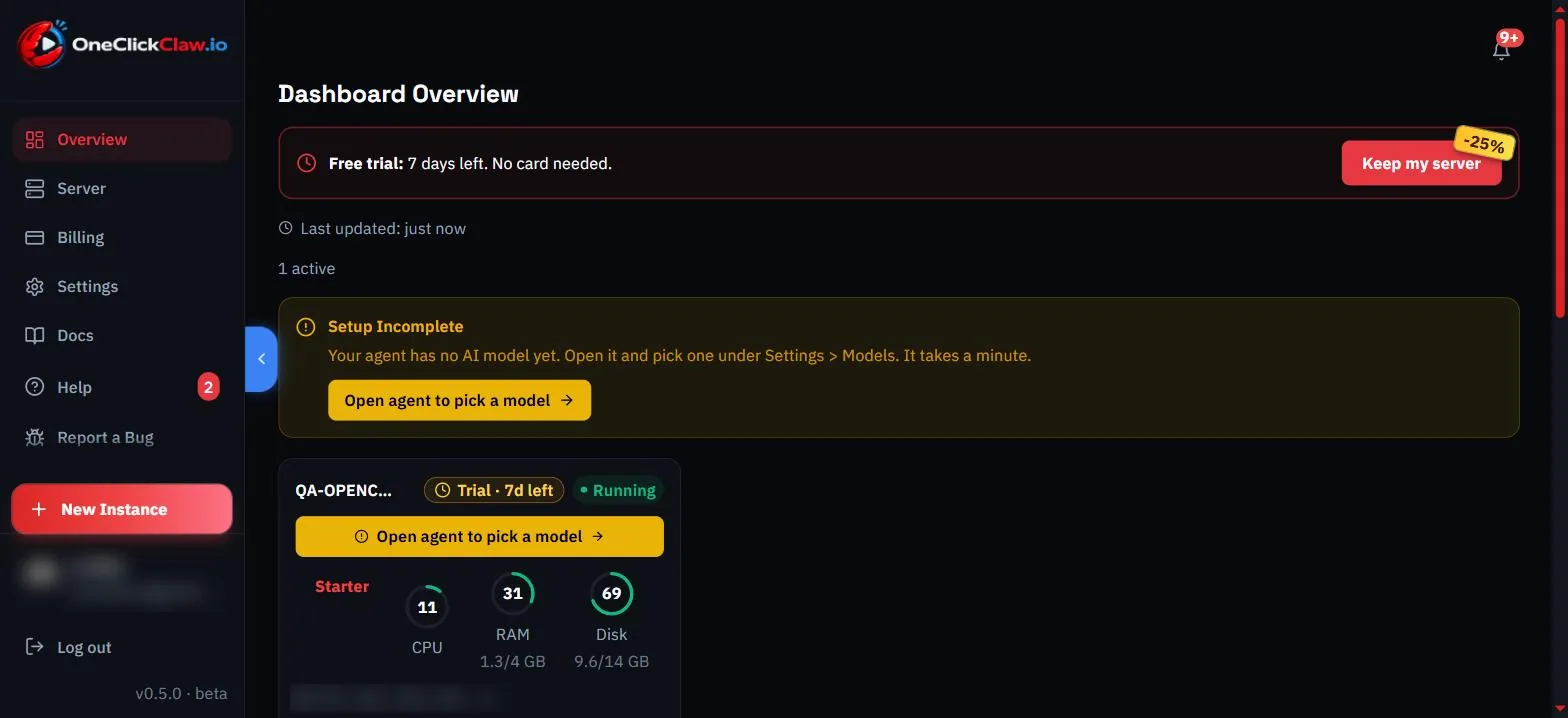
On your dashboard, press the yellow Open agent to pick a model button. Your agent opens in a new tab, straight on its Model Setup page.
Step 2: Find ChatGPT Device Pairing
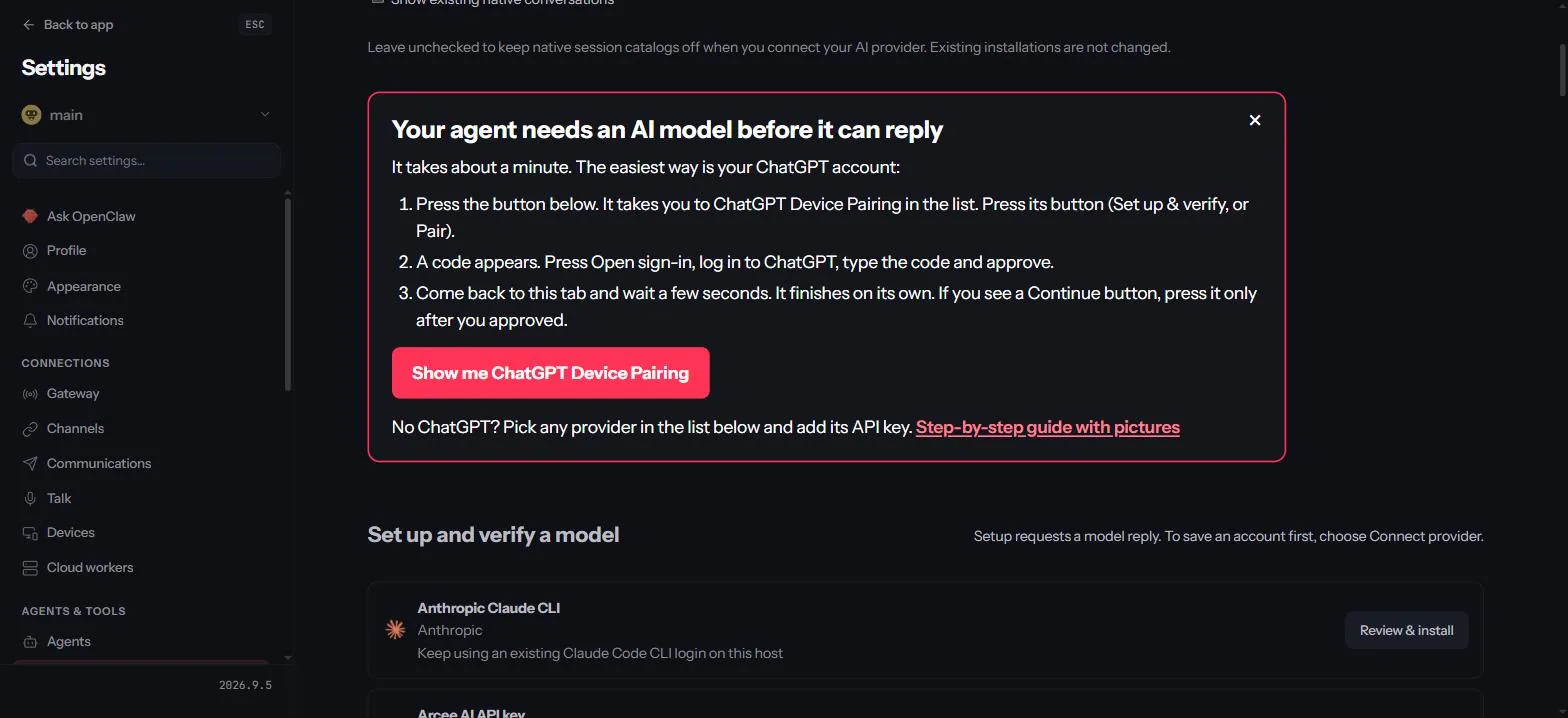
At the top of Model Setup, a red box lists the steps. Press Show me ChatGPT Device Pairing: the page jumps to the right row and marks it in red.
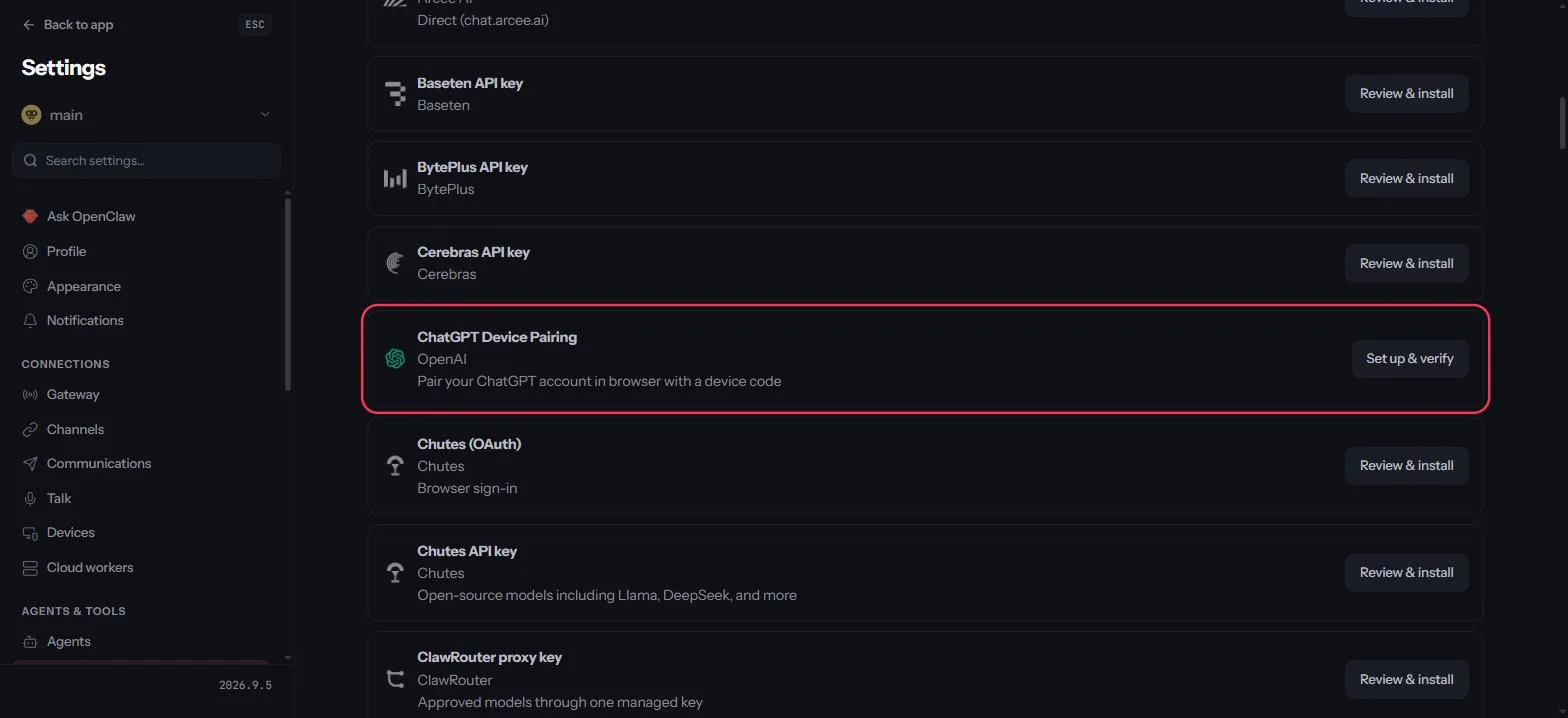
Press Set up & verify on that row. On older servers the same button is called Pair.
Step 3: Enter the code on the OpenAI page
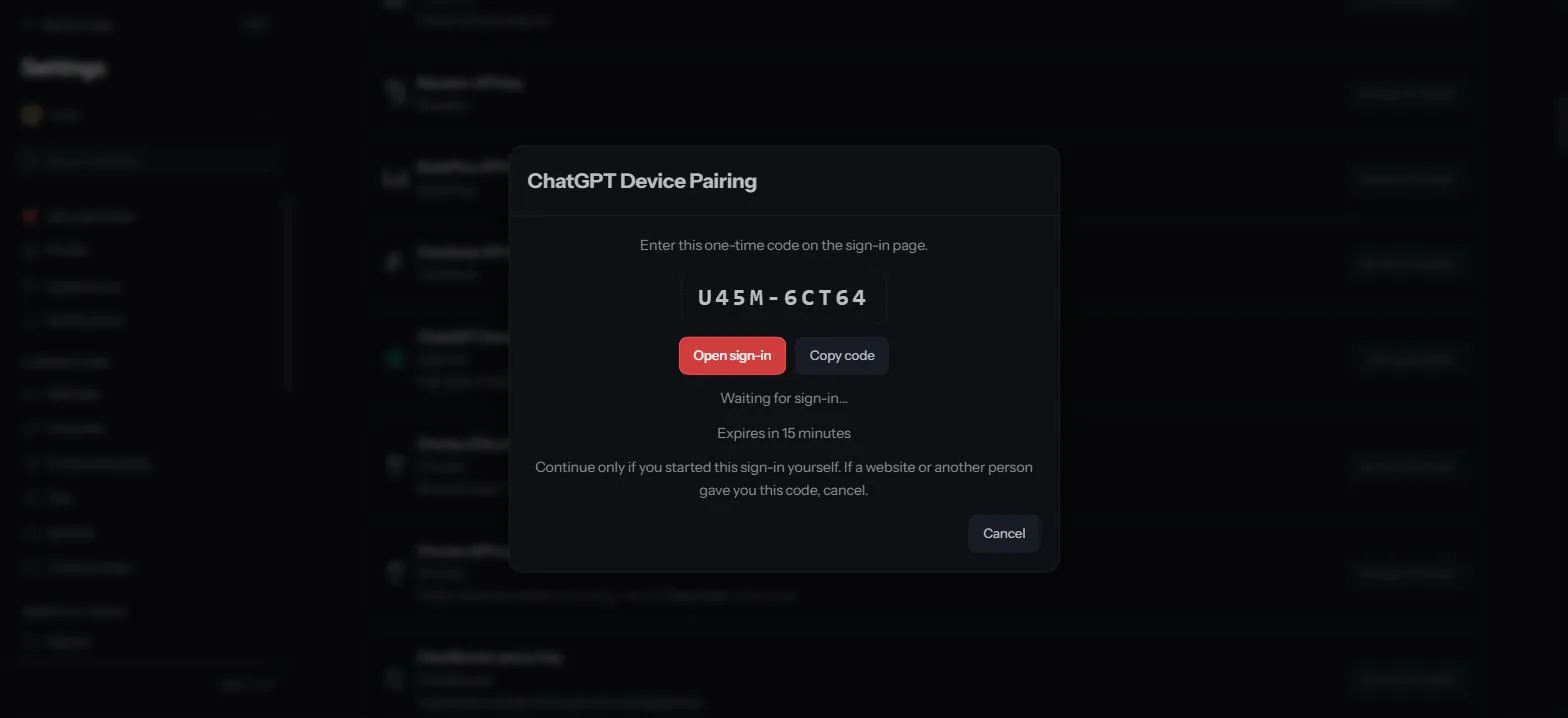
A window with a one-time code appears, together with the note Waiting for sign-in. Press Open sign-in. The OpenAI page opens in a new tab: log in with your ChatGPT account, type the code (Copy code puts it on your clipboard) and approve.
Tip
The code works for 15 minutes. Keep the agent tab open while you approve. To stop halfway, press Cancel in this window before you leave the page.
Step 4: Come back to the agent tab
Return to the agent tab and leave it open. The window is waiting for your approval and moves on by itself once OpenAI confirms it. OpenClaw then checks the model with one short test message and marks it as verified.
Warning
On OpenClaw 2026.8.2 (the version number sits at the bottom of the agent's settings menu) this window also shows a Continue button. Press Continue only after you approved on the OpenAI page. Pressed earlier, it ends the sign-in and you start again from Step 2.
If something goes wrong
Could not finish, with already in progress under Details
A sign-in you started earlier is still open, maybe in another tab or from before the page reloaded. If that tab is still open, finish the sign-in there or press Cancel. If you closed it, restart your server: on your OneClickClaw dashboard open Server, press Reboot and wait until it shows Running again. Then press Set up & verify once more.
API rate limit reached
OpenAI is limiting requests for the moment. Wait a while and try again, or connect an API key as described below.
Still stuck? Open a support ticket from your dashboard and tell us which step you reached.
Prefer an API key?
Every provider in the Model Setup list works with its own key: OpenAI, Anthropic, Google AI Studio, OpenRouter, DeepSeek, Mistral and many more. Press Review & install next to the provider, paste the key and follow the steps. The key is stored on your own server.
Next: connect a chat channel such as WhatsApp or Telegram, described in Set Up Your Agent Inside OpenClaw.